
A crap load of confusion and theoretical reading led me nowhere.
Understanding Docker or anything today is basically rolling your sleeves up and jumping in headfirst.
That’s what I did and here’s what I learnt:
Docker is an application used to create isolated environments and packages of applications you want to run on your system, without actually having to download the whole thing.
It’s lightweight, easy to access, and easy to control.
Translation: you can have access to an app from your Play Store without having to worry about storage(sounds kind of awesome, I know.)
Now that you know what Docker does, here’s what’s actually running under the hood
Consider the OOP approach of using classes and objects to make functions and data access easier by creating objects and classes similarly. An image is to a container what a class is to an object.
An image: No, it’s not an actual image, but a file with instructions on creating and building something called a container.
Which brings us to the second component:
A container: A container is the environment that is created using the instructions provided in the image file. A container is what allows us to activate access to an environment and gives us access to using an application.
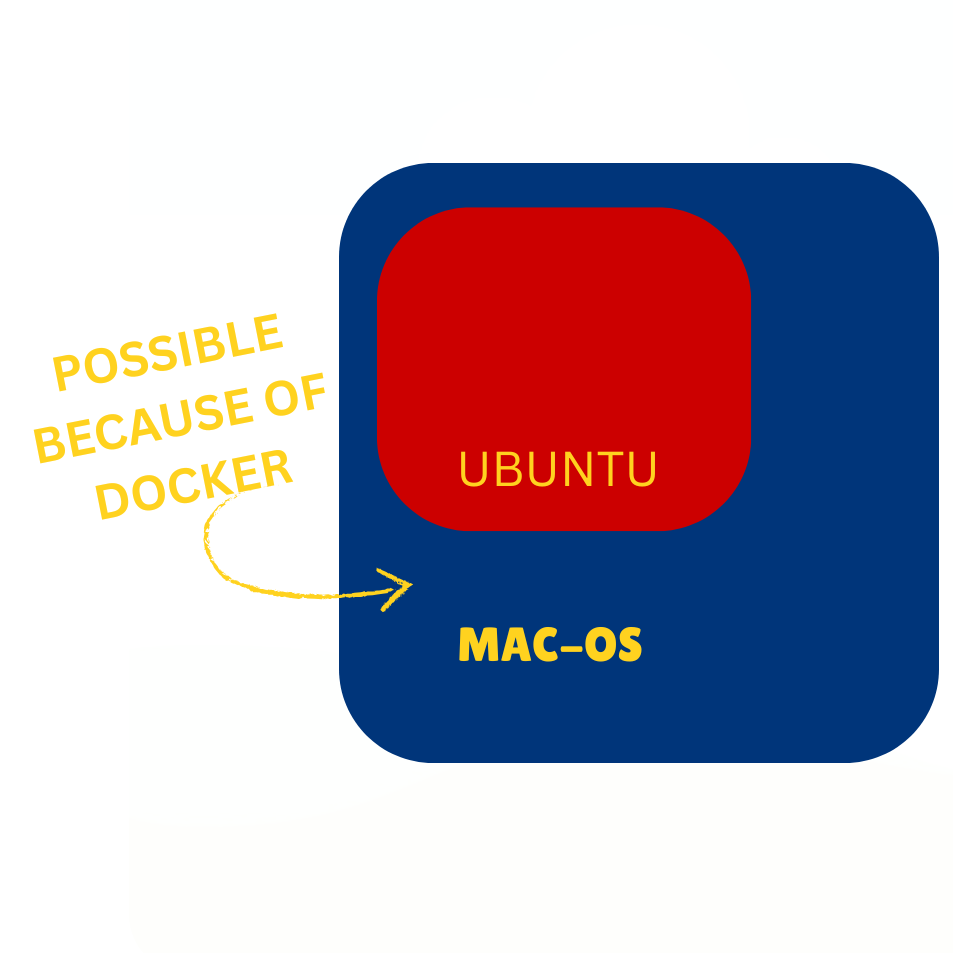
You honestly understand Docker by implementing it. Aka get your hands dirty and take baby steps towards a path of better understanding
To get started, take the following baby step: Download Docker Desktop onto your system
Basic commands to run and play around with:
I decided to run the most basic command, and here’s the list of commands that are pretty simple to understand for beginners:
| NAME | WHAT IT MEANS | IMPLEMENTATION |
| docker pull IMAGE_NAME | Pulls an Image from Docker Hub | docker pull hello-world |
| docker images | Shows all images loaded in your Docker | Docker images |
| docker run IMAGE_NAME | Gives access to the image | Docker run hello-world |
| docker run -it IMAGE_NAME | Gives access to the image in interactive mode | Docker run -it hello-world |
| docker start CONT_NAME or CONT_ID | Starts up the container | Docker start Ubuntu |
| docker stop CONT_NAME or CONT_ID | Stops the container | Docker stop Ubuntu |
| docker ps -a | Lists all the containers in the system | Docker ps -a |
| docker rmi IMAGE_NAME | Removes the image from Docker | Docker rmi hello-world |
| docker rm CONT_NAME | Removes the container from Docker as well | Docker rm ubuntu |
Here’s a brief overview of my implementations and trials:
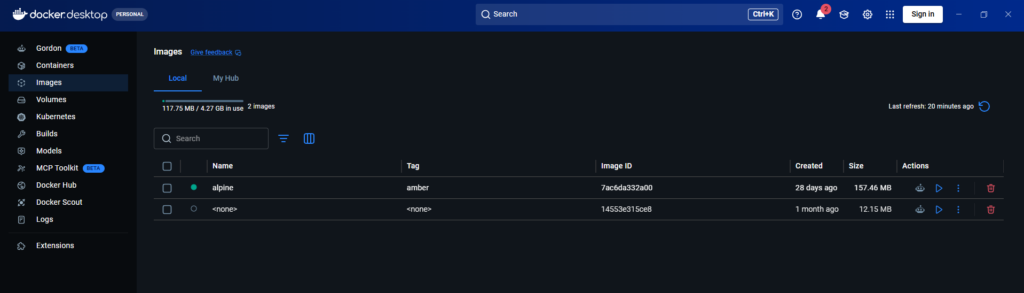
This is how your Docker Desktop is supposed to look before any baby steps
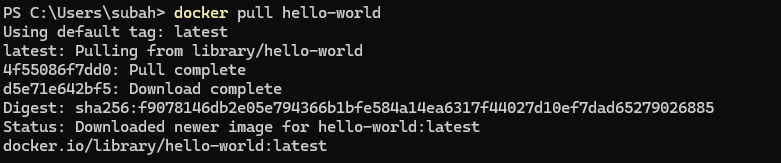
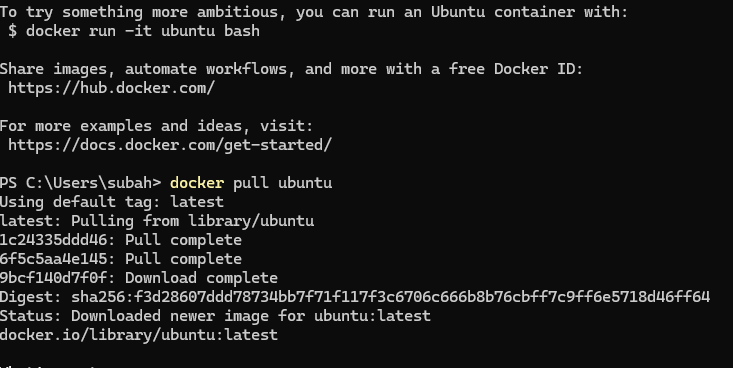
Baby step 1: I pulled the hello-world image from Docker libraries to see how it responds, and as you can see, it gives a spooky but reasonable response, which translates to “your image has been pulled as its most recent version.”
Baby step 2: I also tried to see the list of images I had pulled and how they were arranged, and I could see every Image with its own ID.
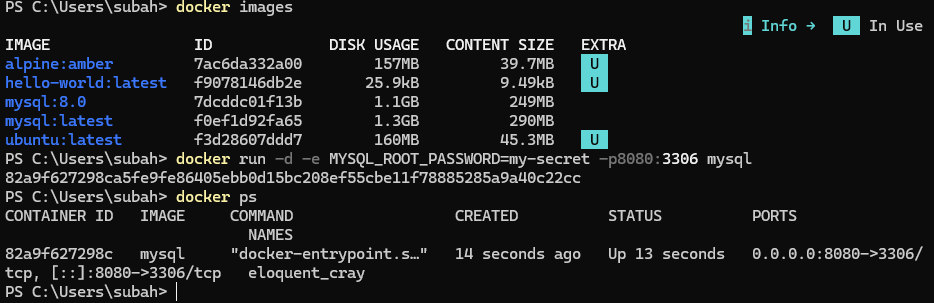
Baby step 3: I also tried other such images like Ubuntu and MongoDB to see if I can get access to them.
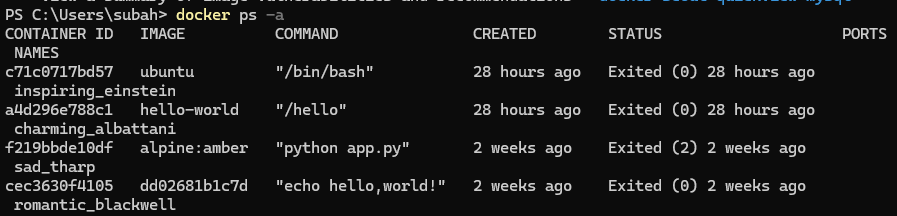
Baby step 4: I ran the “ps -a” command to see what containers I had.
I took these baby steps and understood most of the responses that I got; however, I could not mentally picture a Docker image and how I was “pulling” and “running” an image. So I actually tried to visualize it
Here’s what I learnt.
What does a Docker image really look like and consist of?
A Docker image, if imagined, looks something like this:
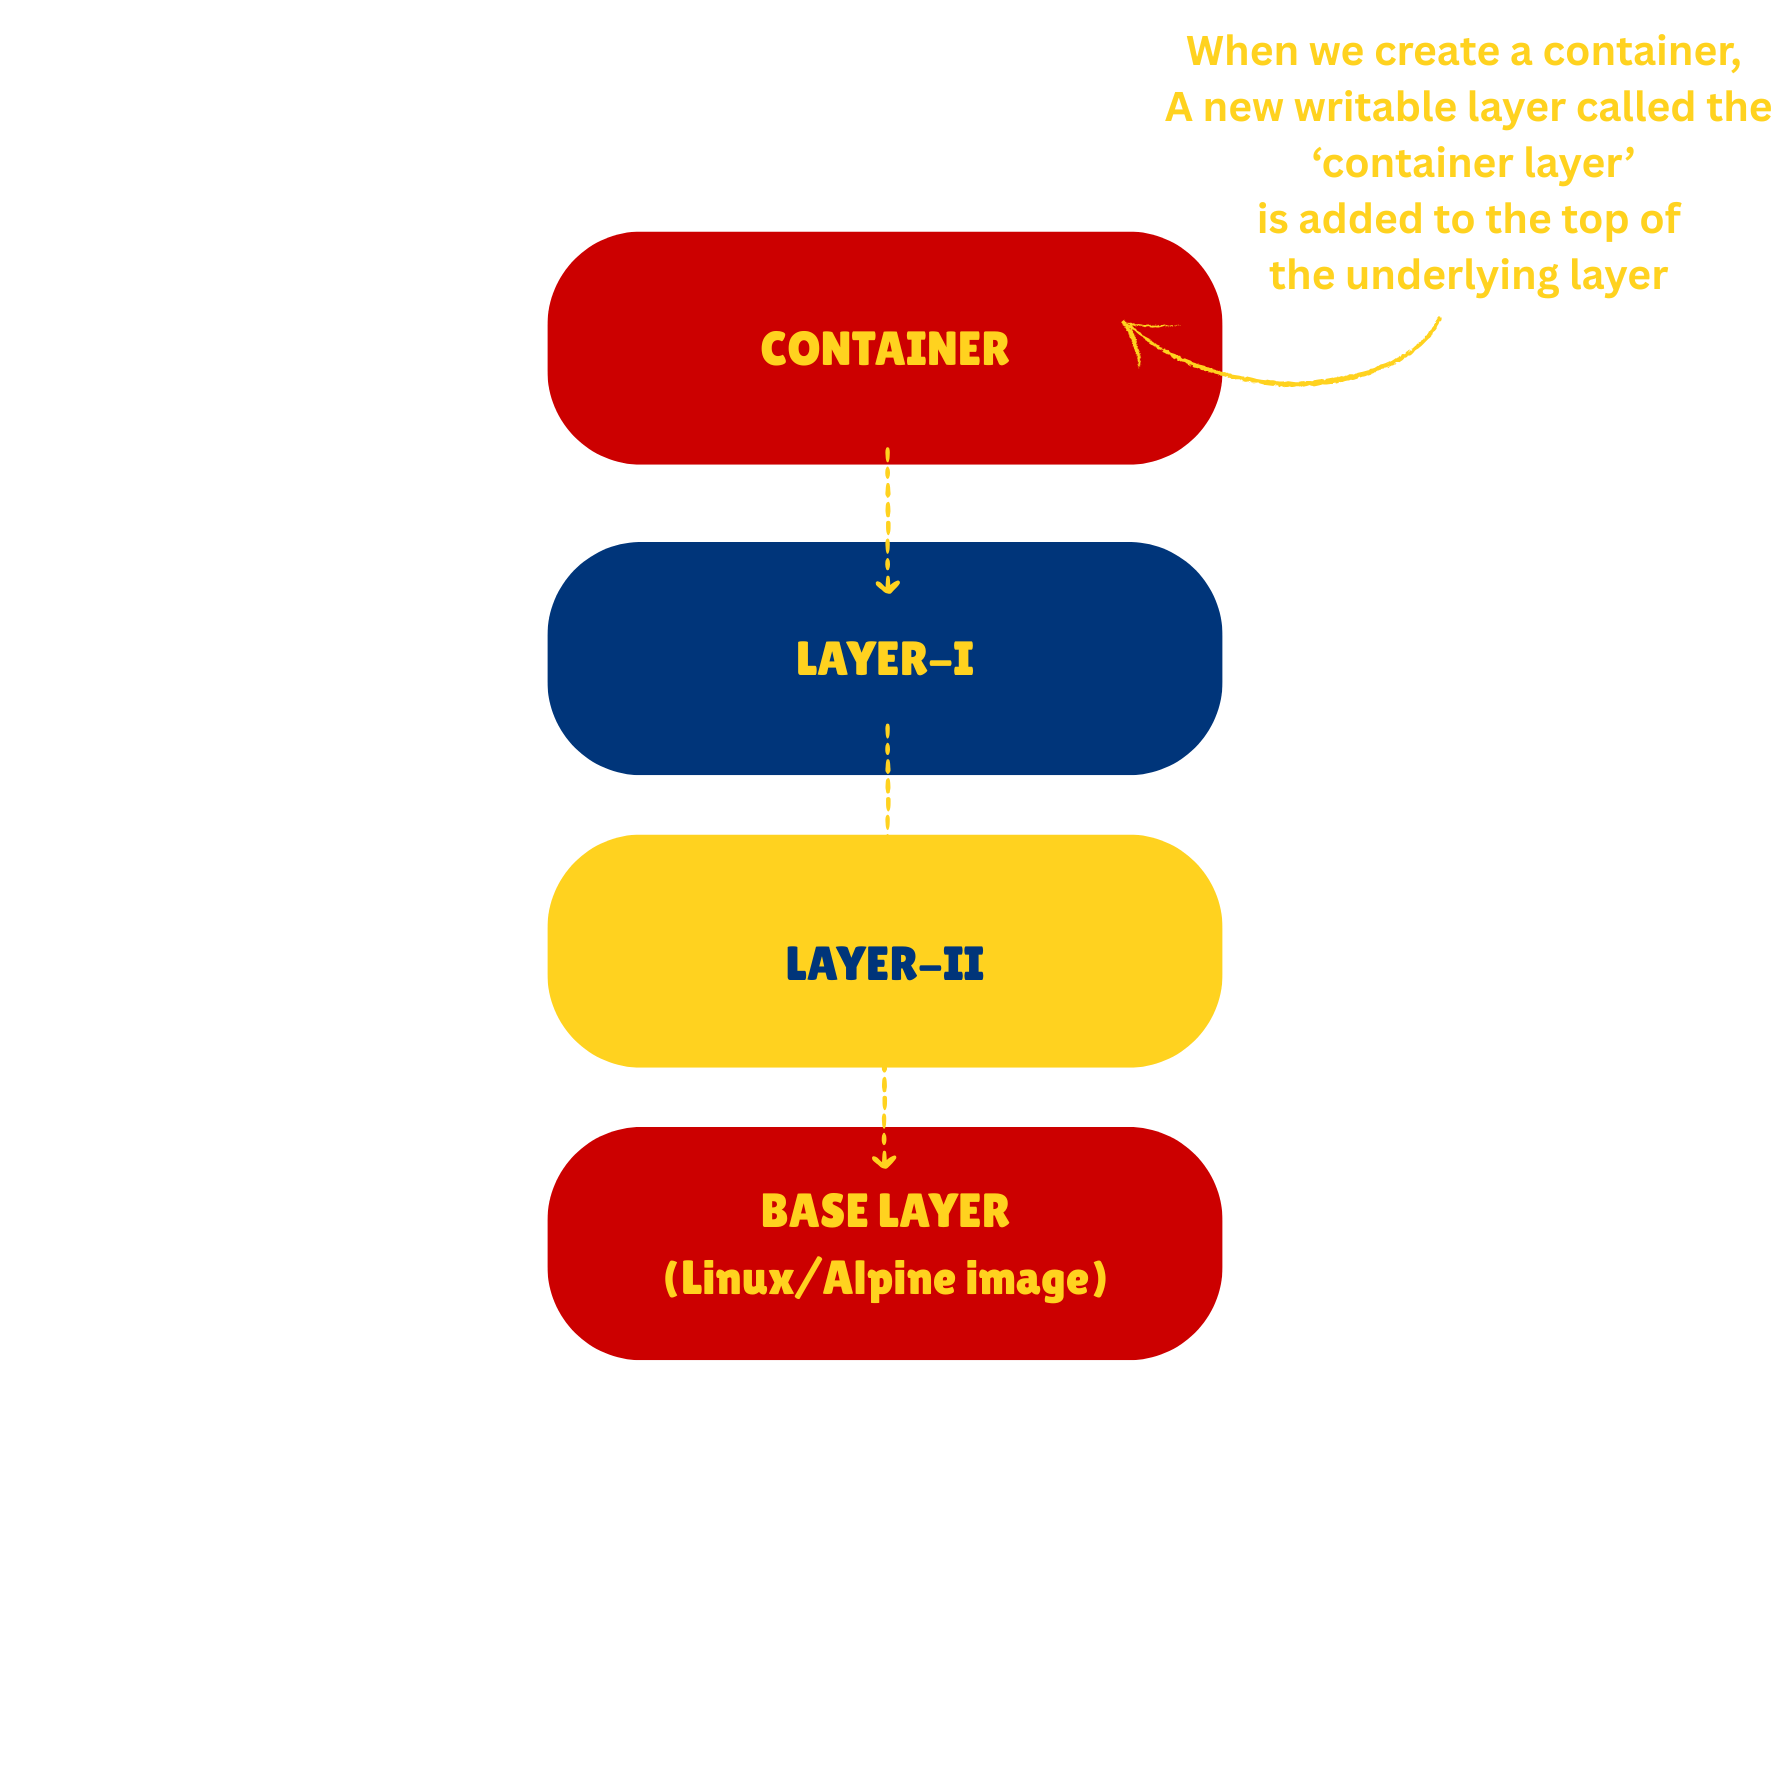
A Docker image consists of a base image, a couple of read-only layers(i.e., Layer 1 and Layer 2), and on top of these layers, we create our container to add other functionalities. When we pull or run an image, you can imagine pulling all these layers onto your Docker and running them all together
As I understood how images and containers worked fundamentally, I began to wonder how this was any different from a virtual machine
It felt the same, and I thought I had wasted my time, but that’s where I was wrong, and let me tell you how.
Docker vs Virtual Machine
A virtual machine and Docker might sound the same in theory, but they are quite different.
To put it simply, a virtual machine downloads an entire operating system onto your personal computer, while Docker acts like an App Store and allows you to download applications through it.
Translation to technical terms:
A virtual machine is a complete system that virtualises both the application layer and the host operating system kernel (the friend that communicates between the hardware and applications of the system). A virtual machine is heavy for this very reason and takes longer to install and access(believe me, I know!)
A Docker provides a lighter and simpler version of just the application layer (Just jump in, run a command, and play)
Speaking of friends and communication, Docker has another concept at play that helps you interact with your host machine. It is called Port Binding.
What is Port Binding, and how does it really work?
Port Binding, in simple terms, is connecting host machine ports to container ports, so requests can be sent to containers from the server ports.
The host machine ports take requests and queries from the user and send them to the container through these ports.
The process of manually connecting these ports is called Port Binding.
When a container is created in Docker, it is by default bound to a port.
To connect it to the host machine port, you use:-
| NAME | WHAT IT MEANS | IMPLEMENTATION |
| -p host port:container port | Connect the host port to the container port | docker run -p 8080:3306 IMAGE_NAME |
This is how the binding looks:
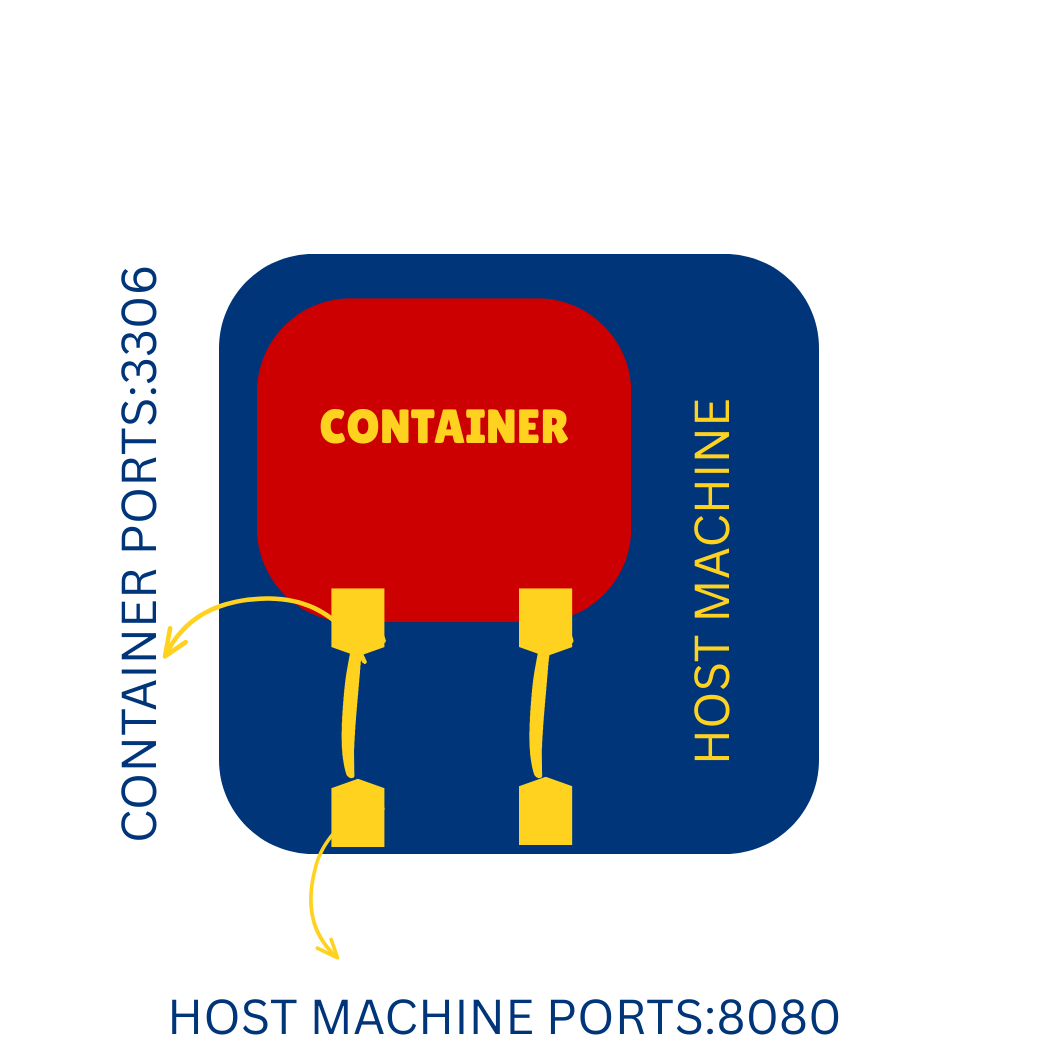
To understand it better, you can look at the hotel manager theory:
You’re at a hotel
The hotel is your computer (the host machine).
The hotel has a main reception desk with a phone that serves as your host port. Guests and visitors call the reception on one number, say extension 8080.
Each room in the hotel is a container. Each room has its own internal phone that’s the container port. Room 403 has its own internal line, say extension 3306.
When someone calls extension 8080 at reception, the receptionist doesn’t handle the request themselves; they forward the call to room 403 on extension 3306.
That forwarding is Port Binding.
The person in room 403 picks up, has the conversation, and responds. That response travels back through reception to the original caller. Traffic goes both ways through the same connection.
If nobody binds extension 8080 to room 403, calls to reception never reach that room. The room exists, the phone works, but nobody can reach it from outside. That’s a container with no Port Binding.
Now that all this theory started to make sense, it was once again time for a practical.
I decided I wanted to Dockerize my previous Flask app, which I created (check my older post! )
How did I Dockerize and what I learnt.
This is what Dockerizing your app looks like:
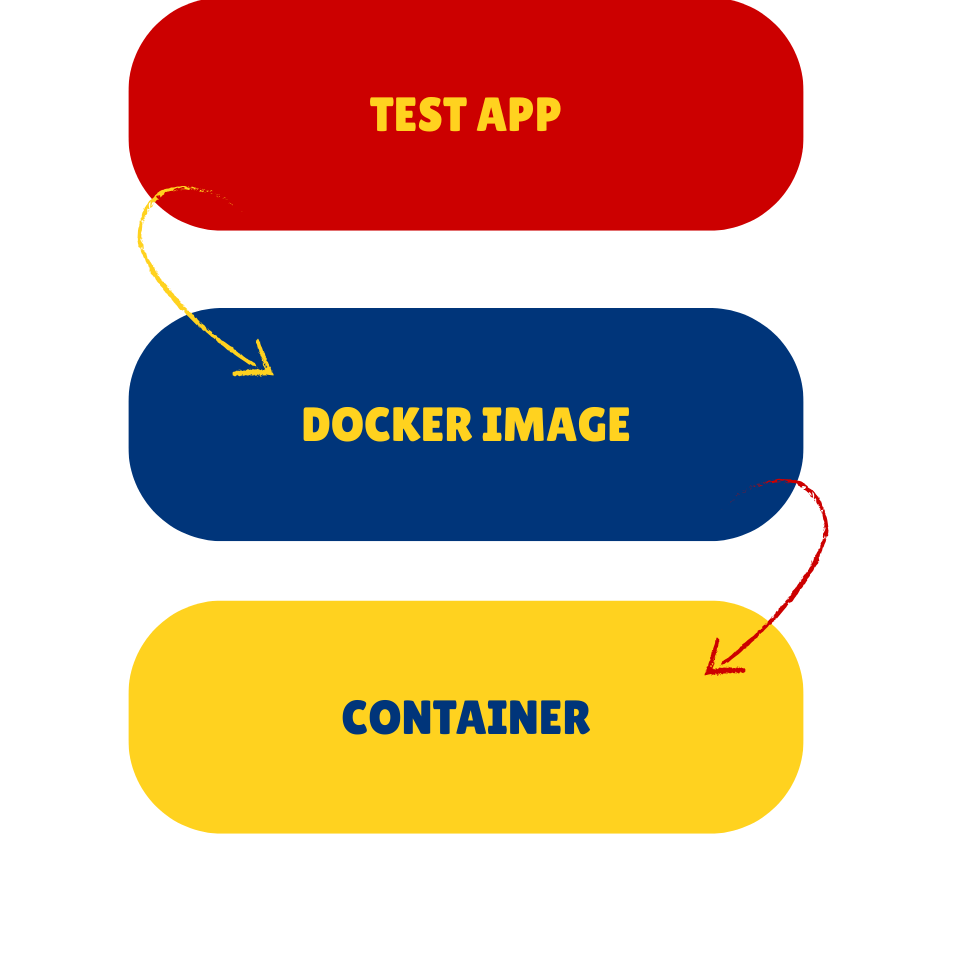
To Dockerize your application, you need to portray yourself as a chef cooking your specialty.
On today’s menu: A Docker File.
The Docker File
The Docker image has the following set of instructions, or as any chef would say, to cook your very own Docker image, the ingredients you will need are:
| NAME/INGREDIENTS | EXPLANATION/QUANTITY |
| FROM | Defining the base image |
| WORKDIR | Defining the working directory, A path where commands are run, and files are executed |
| COPY | To copy any data from the host to the image |
| RUN | Any instructions that require execution immediately |
| CMD | The default command to run the container |
| EXPOSE | Exposes image ports |
| ENV | Defines environment variables of the app. |
Here’s my version, all cooked up and ready to serve:
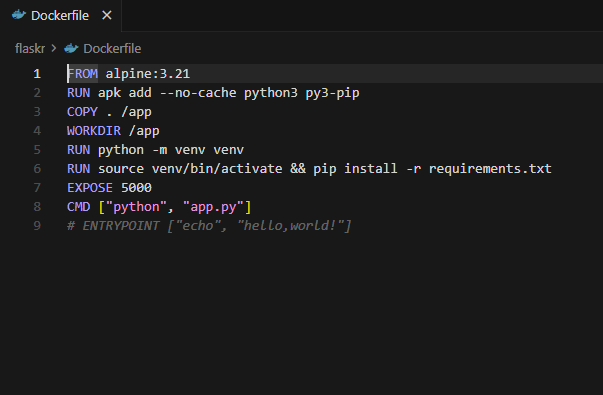
I used Alpine as my base image because it is a lightweight linux operation system.
Alpine uses “apk” as its package manager(like apt on Ubuntu).
The RUN instruction installs python3 and pip into your container.
The COPY instruction seems pretty simple, as it just asks my machine to take everything inside my “/app” folder and copy it.
The “WORKDIR” asks the app to execute any instruction from inside the “/app” folder
Further, the RUN commands create a virtual environment inside the container called ”venv” and install all app dependencies.
I used the EXPOSE instruction to tell my app to run on port 5000, which took me a minute to figure out.
The CMD instruction uses the keywords to bring my app to life and get it started.
I explained it in layman’s terms, but the process was pretty confusing, and I had to go back and refer to my own notes multiple times.
Fun fact: my notes inspired my diagrams, and I created them personally.
I say this because understanding Docker or any concept will take time, but it’s time that’s worth it, so to any beginner, all I would say is:
A crap load of confusion and anxiety over Docker might have led me nowhere, but sitting with the blank terminal, scratching my head over not being able to remove my image because it was being accessed by a specific container, and working through those commands did get me to build my own tiny app.
