
Why I wanted to learn Flask
Coming from an electronics background, no matter how many animated versions of deployment and integration I saw, I could not paint a proper picture of how things worked. I could explain discrete-time signals and the FIR filter design, but if you asked me how webpages worked, I drew a blank. But I was curious, and I knew how I wanted to learn. I had to build.
I wanted to learn by implementation to understand the complete infrastructure of backend development without it taking months. So I decided on Flask. It’s simple, minimalistic, and Python-native — perfect for a backend newbie.
Here’s how I built and learned at the same time:
What I built
I followed the simple tutorial that helped me with installation and a quick start with the basics.
This tutorial helped me create a simple blog application called Flaskr.
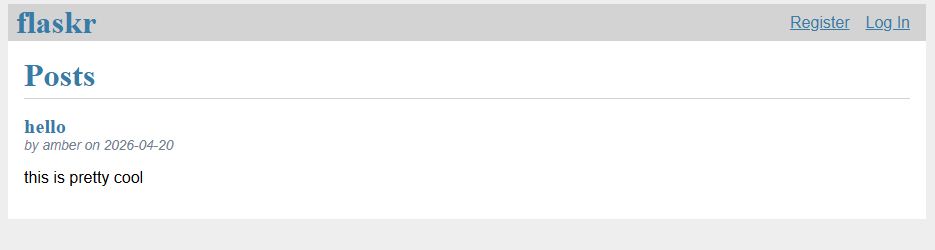
Flaskr lets users register, log in, and boss around their blog posts — create, edit, delete, repeat.
Building it was pretty simple and easy to understand, as the tutorial took a boilerplate approach, which meant that I could review codes and templates before actually applying them myself.
The real relief? One function to rule them all — the app factory pattern that connected everything else.
I built two blueprints — one handles login stuff, the other handles your actual blog posts. Simple, but honestly satisfying once it clicked.
Templates or the HTML doc responsible for every page layout, and a database to store user information were also created and connected to the main function.
It all seemed to connect like a well-built circuit that was efficiently typed out in English.
GET, POST, and Why They Sound More Complicated Than They Are
To understand how Flask works, you have to understand the basics of browser-system communication. There are two types of requests Flask handles. GET loads a page like when you clicked this URL. POST submits something like when you fill in a form.
The flask app receives these requests and starts matching the URL to a function that will service the user’s request created by @app.route()
This can be explained with the same blog post scenario. When you create a page called blog in your application. To create access, you simply write @app.route(/blog), which matches the URL to the function that returns your blog page.
Once the URL is matched, the router takes the user to different pages.
How It All Wires Together
In a scenario where you are a new user, you’ll need to register in order to get access to the application. So the initial page displayed was the registration page. It takes a username and a password and asks the database to store this information. Why store? You ask, the answer is simple and brings us to our next page.
The login page requires users to input their username and password, which are then cross-verified through the database, and their respective blogs are then displayed on the blog page.
The blog page has three main functionalities: create, delete, and update.
All of these seemed nerve-racking to code as I proceeded to read through the tutorial.
A Few Lines Worth Knowing
Setting up the app factory- the one function that starts it all:
def create_app():
    app = Flask(__name__)
    app.config.from_mapping(
        SECRET_KEY='dev',
        DATABASE=os.path.join(app.instance_path, 'flaskr.sqlite'),
    )
    return app
Registering a route – this is how Flask knows where to send you:
@app.route('/blog')
def blog():
    return render_template('blog.html')
A blueprint – how Flask keeps auth and blog logic separate and clean:
bp = Blueprint('auth', __name__, url_prefix='/auth')Handling a POST request – what happens when you hit submit on a form:
@bp.route('/register', methods=('GET', 'POST'))
def register():
    if request.method == 'POST':
        username = request.form['username']
        password = request.form['password']
Do not be afraid of things taking a little time to make sense. Once I reviewed the blog page blueprint, it all made sense. The create, delete, and update operations all had their very own functions that were connected to the main function.
It seemed as simple as an OOP concept!
Whenever a request was made through the browser, the route to the page was mapped by @app.route(), and functions that were required were called through the main function and executed. It was just that simple.
You can find the full code here: https://github.com/asgeeketteamber/flaskr
If you’re a beginner who learns by doing, just build this. It took me from ‘I have no idea how webpages work’ to ‘oh, it’s basically just a circuit diagram in Python.’
Next up, I’m going down the Docker rabbit hole.
Come with me: https://youtu.be/DQdB7wFEygo?si=HbR5jPbHabDXw0bI

1 comment
Hi, this is a comment.
To get started with moderating, editing, and deleting comments, please visit the Comments screen in the dashboard.
Commenter avatars come from Gravatar.